Sunday, December 4, 2011

Birthday Party in the Fast Lane


Here are a few DIY party decorations for a race car theme party. 

Our little rock star is turning 5, and we are throwing him a birthday party! We are going to order pizza and have cake and ice cream (easy and kid friendly) 
I whipped up a few decorations, using things I already had around the house :D
First the tissue balls
A fellow blogger inspired me to make the awesome tissue ball. (you can check out her AMAZING blog here and her "how to" on the tissue puffs here) I decided to make one large tissue ball, and hang it from our dining room light. Then I added 3 paper circles on yarn below it.

How to make the tissue ball:
Using 1 pack of tissue, fold it accordion style (think paper fan from grade school)
Tie center with string
Trim edges to a point or rounded
Pull each piece out one at a time, and fluff
Hang and enjoy!
*You could even add some of those decorative picks or even feathers into the ball!
DIY fabric garland
This project was inspired by my high school cheerleading squad. We use to make our hair ties this way. I made 6 small garlands, one for each chair, and then I hung a checkered flag on each. The result is a festive dining room! The best part about this project was the fact that I used scrap fabric and yarn I already had on hand, so it was completely free!

How to make fabric garland:
Cut string or yarn to desired length
Cut fabric into strips. Length and width are up to you ( I did 1” by 4”)
Tie fabric to yarn alternating colors
Hang garland and enjoy
*you can also use tulle, ribbon, rickrack, feathers etc to add interest.
*another cute idea would be to tie fabric onto a string of lights, plug in and WOW!
Silver wear holders
So I drink a LOT of coffee, and always have a surplus of plastic coffee canisters on hand. We have used them for projects, painting, keeping homemade play doh fresh etc. I thought they would make cute silver wear holders for the party. All I did was glue on some ribbon, and make mini checkered flags (I used a black marker and ruler) and glue the flags on. PRESTO! Cute silver wear holders. Again, I had everything for this project on hand.


Checkered flag banner

Using my Cricut, I used the wild Card cartridge and cut out the argyle pattern onto black paper, then glued it onto white paper. I then cut out a triangle, or the flag. After I made several flags that way, I glued them to ribbon, and you now have a checkered flag banner! It was very easy and provides a great end result.

Saturday, November 19, 2011

Weekend Project Time

Happy weekend to you all! What are your plans this weekend? Do they involve shoveling snow? LUCKY! However, here in the south (as I always call it) we are going to be somewhere in the mid to upper 70s this weekend (which would be fine if it were September, but it’s NOVEMBER!). So with all this nice weather, I am going to attempt to start my table overhaul! What is this table I speak of you may wonder, here is the story….
Well, since you asked; Last spring my oh so amazing and very understanding hubby drove me the hour to Oklahoma City so I could buy an old and very beat up table and chairs out of some guys shop. HA! My hubby loaded it up in our trailer, no questions asked, and away we went. I was so excited I could hardly contain myself! Sadly, for the last 6 months it has sat in our garage (big sad face) BUT THIS WEEKEND I PLAN TO GET A GOOD START ON IT!
First, I plan on taking all the seats off of the chairs, disassembling them, tossing the old foam and yucky fabric, then sand all the chairs. (That should be the easy part) Then I hope to get started on the table… my only problem is moving the big thing.
I should also mention that I have decided to paint, rather than stain, my table and chairs and here is why: First of all I have never worked with stain on such a large scale… So I was a bit intimidated to start out with. Second I have my new spray gun (YAY) Third, I want the table and chairs to be black to match the hutch we already have. With that said if I don’t like the outcome, maybe I will try to stain it… who knows.
I have already ordered and picked up the fabric for the chairs. I chose this….

A dark red fabric, with branches that are brown and black. Since our dining room is Red, with brown curtains and we have a black hutch I thought it would tie in with everything perfectly! I purchased the fabric at Jo Anns during one of their %50 off home décor fabric sales.  I hope to have enough fabric left over to also make a matching table runner :D
As I stated above it’s already November, I had originally  hoped to have this project done in time for my grandparents visit in October…. Now I am hoping for it to be done in time for our kiddos 5th birthday party! Since we moved away from home when he was 2, he has never really had a birthday party. This year though, he is going to have one! He is really into the Disney Cars 2 movie, so we are planning a Cars 2 birthday party… more to come on that!  Right now all we have is our breakfast nook, and I’m having serious doubts about fitting 13 kids around that table!
So here we go!
Here they are- my table and chairs! Aren’t they wonderful! (what a steal for $75 bucks)
And here they are after I primed them....


And here is one painted black... eek! exciting! :D

Half of them in the house.... getting there.....

Ok, so we ran into a minor snag, (we as in my wonderfull hubby and I... see told ya he's a good sport, helping me out and all) when we were taking the cloth off of the old seats, we noticed the wood was falling apart. It was so old and yucky we decided it would be best to make new wooden seat bases...
Isn't he a great man!!! :D So darn handy, and never complains about my crazy projects. (I'm so lucky)

And there they are, the new wooden seat bases (well there is one anyways)...
Alright, on to the table... As you can see we took it apart, I have decided to spray only the legs black. I am going to sand down and stain the top a dark drown. I just think if I paint it all black it will look so dark! So thats the plan... so far any ways ;)
After I went to the city and got enough foam for the chairs, I covered the seats. I think they turned out pretty nice, for my first time anyways! Jack Jack approves of the first chair.

*MORE TO COME*


Monday, November 7, 2011

How to Etch Glass

Here is a glass etching tutorial for you. My husband and I did this last Christmas for gifts, and they went over REALLY WELL! (that’s right my wonderful hubby helped me, he’s such a good sport)
What you will need:
Glass etching cream (found at craft stores for about 15-20 bucks)
Rubber gloves
Small craft paint brush
Contact paper
Paper punch or exacto knife
Newspaper or drop cloth
You will also need access to a sink because you will need to rinse the etching cream off the glass.


The first step is to cut your contact paper to size. Since I was making snow flake etchings, I cut small square pieces.

Then use your punch to punch through the contact paper. You could also use the exacto knife and create your own design. After you have done that, peel and stick the contact paper firmly to your glass object.
Next, with gloves on, paint on the etching cream and let sit according to the directions on the bottle.
After you have let the cream sit, and with your gloves still on, rinse with water and take off the contact paper.
You now have a cute etched gift!

Some ideas of object to etch are:
Glass mugs
Glass pitchers
Glass cups
Glass serving bowls
Glass plates
Candle holders
Mirrors
You can even go as far as to etch designs onto windows and glass doors.

Tuesday, November 1, 2011

GIVEAWAY TIME!

Today is the day for the giveaway! The winner will receive a hand etched coffee/tea mug, hot coco mix, and a handmade holiday card.
Using Random.org, I got a random number, each follower had been assigned a number prior to the random number generator, and the winner is….
Coqueta Bonita!!
Congratulations!


Please e-mail me at  allwithamanicure@hotmail.com  and include your name and mailing address,by November 15th, so I can send you your prize!


Thank you so much to everyone who has followed my blog so far! I hope you are enjoying it, and I hope it inspired you to be creative!

It's really hard to see the etchings on the mug- there are snow flakes etched on it! CUTE!

Thank You cards with my Cricut

 I needed to whip up a few thank you cards for my grandparents, after their visit, for all they helped us with. I hadn’t planned these cards out so I needed to use what I had on hand. I wanted to make a card “from’’ my son, so I can up with this cute card…

I used the Play Time Cricut cartridge for this card.

I also made this cute card, which I used the Wild Card cartridge, for the ‘Thank You’. And then I just layered paper and some fun yarn! Pretty easy, and looks nice. (at least I think so)

I am really having fun with my cricut! I cannot wait to work with it more. Since the hubby has been home on vacation, we have been so busy with the house and having family over. Keep checking back there will be more goodies!

Monday, October 31, 2011

Happy Halloween!

Happy Halloween!!!

My hubby and I spent the majority of the day insulating our garage apartment, but we did manage to take our Rock Star, who went as a ghost, trick-or-treating tonight.  I have noticed a trend here in our little Oklahoma City, where the parents drive their kids from house/block to house/block.  Now when we were kids our parents either walked with us or when we were older sent us on our merry way! Any who, we had a great time! Hope you all had a great time too!
I wanted to remind you that the drawing for my first ever giveaway will be tomorrow! All you need to do to be entered to win is follow my blog :D
The prize is a hand etched coffee/tea mug, coco, and a handmade holiday card. If we get 30 followers I will give away two sets! If we get to 40 followers I will give away 3 sets! Be sure to follow and good luck!

Saturday, October 29, 2011

Coupons!

     I wanted to take a moment to post a coupon I found for Hobby Lobby. If you have Facebook, head over to the Hobby Lobby Facebook page found Here, and locate the coupon tab on the left hand side (you might need to "like" their page first).  They occasionally post a coupon. YAY! They currently have a 40% off one regular priced item, which I used  yesterday when I went.
     Also a reminder, if Hobby Lobby doesn’t have what you need (is that even possible) Jo Ann’s accepts competitor coupons. However, I have never needed to use a competitors coupon at Jo Ann’s because they send out a flyer with some great coupons on it, but the option is there.
     Speaking of Jo Ann's They have an online promo code that can also land you 40% off a regular priced item. Check out their site, here, to get it. Also remember that Jo Ann's Friends and Family sale is November 4-6th. 
If you are wondering how you can get the latest sales and coupons from Jo Ann's here is how:
     Sign up for email here (located at the bottom left page).
     Sign up for their mailing list here.
Happy couponing!

Thursday, October 27, 2011

Good Thursday Morning! (10/27/2011)

image from etsy.com

ONLY 5 days until I draw the winner of the giveaway! YAY! The prize will be: a hand etched coffee/tea mug, hot coco, (possibly some handmade fudge) and a cute handmade holiday card!!! Keep it all for yourself or give it as a gift this holiday!
Remember all you need to do to win is follow my blog! Thanks!

Drawing will be November 1st.

Thursday, October 20, 2011

Fall Cards


WELCOME FALL!
Image Property of  
spartansusscraper.blogspot.com 

It has finally cooled down here in the south! Well a little bit I guess, we are talking 60’s. Up home in WI they are getting down to the 20’s (oh how I miss that!)  The hubby just got back from his trip to WY, where he said they had flurries- Jealous!!  
But anyways, I am in the mood for fall activities! I’m talking cooking crafts and a pumpkin patch! Last night I made a stuffed pork loin, sweet potatoes and apple pie! YUM!  So my plans for the day are to take my kitty cat to the vet, and then head to Hobby Lobby (YAY) and get some fall inspired paper. After all my new cricut is longing to be used! So I was looking online for some inspiration, and I found the cutest scarecrow card on http://spartansusscraper.blogspot.com  (awesome blog) I plan on making something similar.

Alright, here they are...
(yes they are very similar to those on the spartansusscraper blog, but what can I say I loved hers! Mine aren't quite as cute, but for my first card using my cricut I am happy, and I am sure my family will love them!)


Remember to follow my blog  for a chance to win a handmade gift! Drawing will be November 1st!

Wednesday, October 19, 2011

Happy Wednesday! (10/19/2011)

So a few things on this Wonderful Wednesday:
First, DON’T FORGET to follow my first ever blog, All With a Manicure, for your chance to win something hand crafted by yours truly. The drawing will by November 1st, and the prize is to be determined.
Second, please forgive the lack of posts. I am getting ready for company, dealing with a broken (and now fixed) central air unit, along with dealing with a sick cat. Oh yea that and I had a mini emergency at the house which required me to obtain almost a ton of gravel, get it to my house, and unload it by HAND, alone I might add… so THAT took up quite a bit of my time lately. But I will try to get more pics of my projects, and new posts up as soon as I can. Thanks for waiting! :D
Third, I wanted to thank you all for taking time out of your very busy day to look at my first ever blog. I appreciate those of you who have also taken time out to follow it. As a first time blogger, it feels great to watch as the “followers” count grows. Thank you!

Thursday, October 13, 2011

Block Letters DIY

Block Letters
A DIY tutorial

So I saw these at the last craft fair I was at, UBER cute block letters. They are wood blocks with letters painted on them to spell out things. CUTE! I thought, "I could so make something like that!" So I did ;)
Here is what you will need:
*Wood blocks, size is up to you (I used scrap lumber in our garage and cut it to size)
*Paint
*Scrapbook paper
*Glue (I used mod podge- love that stuff)
*Scissors
You will also need a way to make the letters, such as
*stencils
*pre-cut letters (can find these in the scrap book supplies at most craft stores)
*Circut ( I used my BRAND NEW Cricut for this project- YAY)


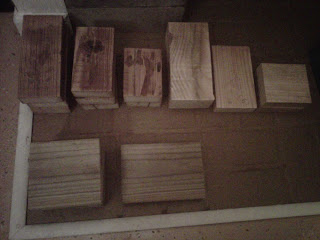
Cut your wood into blocks. I cut several sizes, so I have a variety to choose from.


After you cut your wood blocks to the size you want, practice arranging them. You can line them all up, stack them, set them up however you want!

Next, pick the paper you want to use. Then pick out the paint you want.

Then paint your blocks. I painted the 3 sides, and a bit of the front and back. I did 2-3 coats of paint.

After the paint dries, measure the front of the block and cut your paper to size. I left a bit of the color showing on the front of the paper. Again, up to you.
After you cut your paper to size, check to see that it fits to your liking. If it does glue it on to the front.

Do this for all of the blocks.
I also did this for the back of the blocks, and added a cute little “Crafted by Melissa Jean” onto the bottom of the back.

Now you get to cut your letters out. Size, font, color, etc is all up to you. I like the quirky mismatched upper and lowercase look, so I went with that. I also made a shadow for each of my letters.
Glue the letters onto the blocks.

You can leave your blocks like this if you want (they look pretty cool huh) But I wanted to add a little something more. I used some ribbon I already had, and wrapped them a few different ways. I used hot glue for this step.

CHECK THEM OUT! (the “give thanks” still needs to be embellished)

Happy DIY

Here are a few more of my block letter creations...