
Any one LOVE the look of custom roman shades? I DO! Now what about the cost? YIKES! Well thanks to a wonderful site I stumbled across, Little Green Notebook, I learned how to make my very own roman shades. Big deal you say. You can get patterns and do this right. Well yes, but how about making them for as little as 5 bucks?! WHAT?! Do I have your interest now? :D thought so!
So here’s the deal. These custom looking roman shades are made from material of your choice and mini blinds (oh and glue too). There is no sewing involved, which is great if you’re a beginner like myself, or maybe if you don’t own a sewing machine. Whatever the case, these are fun and easy to make. Oh yea they look great too!
You will need to measure the window(s) you will be making these for, and then get the appropriate size blinds and the correct amount of fabric. I recommend going to Family Dollar, Big Lots, or something of the like as mini blinds can run as low as 3 bucks a pop! Walmart isn’t bad either for about 6 bucks a pop. There is no need to spend a ton on the blinds because you will be tearing them apart any ways- This could be a great way to jazz up your mini blinds, or even salvage mini blinds in rough shape :D Take a look at my BEFORE windows....
 |
| Kitchen Window Before (see my helper Jack) |
 |
| Laundry Room Windows |
Now if you want to make these for UBER cheap, check out your local thrift store for some blankets or sheets. If you get a quilted blanket, it will provide some insulation, a nice plus for an already great deal! For the windows in my kitchen I picked out fabric from my local Jo Ann store. I had some %50 off coupons, so I used those :D For the windows in the laundry room I used my birthday gift card (from my wonderful in-laws) and got the material from Michaels. Either way it was a great deal.

The article I read that inspired me to make these doesn’t have you line the shades, but I went ahead and purchased the cheapest white fabric I could find just to line the back of the blinds. I thought it would help keep the sun from washing out the color and help keep our house a more comfortable temp. This step is up to you of course. If you are planning on lining them, you can buy pretty much any ol' fabric to do this with but I do know they have insulated fabric too. Just a thought.
So any ways after you have your window measurements, you will need to decide how many pleats, or folds you want your blind to have when you roll it up. This is the number of blind slats you will need to leave on the strings. The rest will come off. In order to take off the rest of the slats, you will need to extend the blinds fully and remove the bottom slat. To remove the bottom slat, take the small plastic plugs out of the holes on the bottom, then untie the knots from the cord and slid the bottom slat off.

Next cut the “ladder cord” ONLY THE LADDER CORD! Do NOT cut the thick cord, as this is what will pull the blind up and down. I took the advice of the other article and just ran my scissors up the ladder cord. Remove the cut ladder cord fragments. Next remove the blind slats, leaving only the number of slats you have chosen for the folds.
Now put the bottom slat back on the cords, then measure the length you want your blind to be and tie a knot at that point.(do this on both sides) I wanted my blinds to be flush with my windowsill, so I didn’t leave any extra at the bottom. The length is up to you. You should now have something that looks like this... (the extra slats are pushed up at the top)

After you have re assembled your blind lay out your fabric, right side down and put your blind on top of it.
A few important notes:
You may need to iron your fabric/blanket. If you need to do that, do it before you start gluing.
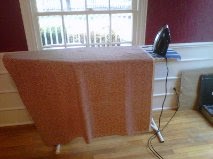
You may need to iron your fabric/blanket. If you need to do that, do it before you start gluing.
If your fabric has a pattern, make sure it is straight at the top of your blind. For example, if you have a row of flowers in the pattern, make sure your blind is lined up straight on that row, otherwise when you hang the blind, it will look like it’s hung up crooked. This is one of the trial and error things I talk about.
Also, as the article from Little Green Notebook states, do not use hot glue for this project. I used Tacky glue, and its holding up fine so far. I love tacky glue :D
If you are going to line your fabric, just cut the liner and fabric to the same size and glue them together using your glue. You can just glue around the outer edge, that will be fine. Proceed with the project.

After you have double checked that your blind and fabric are straight, position your slats where you want them. There is no right or wrong way to do this really, just make sure they are straight. To check to make sure they are straight, just measure from the top down. They should be equal distance down on each side. I found that two tape measures helped me a lot.


Now it’s time to bust out the glue :D I started gluing at the top. MAKE SURE you do NOT glue the fabric to the two very ends of the top of the blind. You will need to be able to hang them later. (there’s that trial and error thing again) You can glue it after it is hung if needed. Next just glue the slats to the fabric, working your way down to the bottom slat. Do NOT get glue on the cord, as this will prevent the blind from working.
After all the slats have been glued to the fabric, fold over the edges and glue those down too. YOU ARE ALMOST DONE!


Now just let this dry over night!!!!! It needs to be good and dry before you hang it up.
You can also add some trim on the top or bottom to jazz them up a bit. I added red trim to the top of my shades in the laundry room.


Happy DIY
Special thanks to the http://littlegreennotebook.blogspot.com/ for my inspiration!
The Roman Shades you made are beautiful. For someone with no experience blogging you are doing a fantastic job Melissa......keep it up :)
ReplyDeletethis is super cute, thanks for the tutorial! i need some window treatments and this looks fun to do! come find my blog as well, i found you on joanns facebook page!
ReplyDeletewww.facebook.com/creativecoqueta